Friday, September 13, 2013

Swiss Pancakes

Every culture has their version of pancakes. In France, they are called crepe's and in Switzerland they are called Swiss Pancakes. My husband gets upset with me if I call this recipe "crepes" because well, his family is Swiss.

So anyways, here is a quick and (fairly) easy meal. We like to have it Friday nights as a special treat (since it can be really sweet if you add raspberry jam and whip cream like we do! :)


3/4 Cup Flour
4 Eggs
2 Cups Milk
1/2 tsp salt
1 tbsp sugar
1 tbsp oil

Put dry ingredients in bowl (we always use our Kitchenaid) Add oil and milk, blending until smooth. Add eggs and beat again. Beat well. Batter should be very thin. Bake on hot griddle. Turn over and roll up.

Mike usually does the actual cooking part. It kinda takes some practice. He uses a ladle to get the batter onto the pan. Make sure the pan is GREASED and HOT before putting a ladle-full into it.


Flip it once. Again, it takes some practice. They should be pretty thin. You can tell when they need to be flipped when they start to bubble.


These taste good with a million different things. We usually do jam, fresh fruit, whip cream, or sometimes just syrup if we don't have anything on hand. Tonight we had them with fresh organic white peaches and whip. 


Baby approved! 

Friday, September 6, 2013

Salted Brown Butter Rice Krispies Treats

The other day I went grocery shopping and found a deal on cereal. We don't usually eat much cereal in this house so I decided on getting a box of Rice Krispies (along with 3 other brands) thinking that I would make some Rice Krispies Treats with them. I thought that Riley (and Jamaal) would enjoy them. 

Turns out my boys have been holding out on me. The cereal (all 4! boxes) is almost gone and it hasn't been quite 2 weeks since I bought it! Jamaal pulled out the Rice Krispies the other day and I made a comment about not being able to make the treats because everyone kept eating the Rice Krispies. I was mostly just stating a fact, and okay with him eating them. I wasn't sure if we had any marshmallows anyway. But he ended up having Cinnamon Toast Crunch instead. So I figured I should hurry up and make them, since I made him change up his cereal choice. 

I googled a recipe and found this: the 50 best recipes. My eye went to a browned butter recipe, and as I was getting ready to print I noticed that the recipe was adapted from The Smitten Kitchen Cookbook by Deb Perelman, which I happen to have! I got a little annoyed, because the author of the blog I first read makes it seem like it was her idea. I'm glad I noticed it was Deb's recipe (which is also shared on her blog!). Because I LOVE her and have been looking forward to using her cookbook for a while. 

So, I pulled out the box and measured what we had left: roughly 5 cups of cereal...and of course the recipe calls for 6. But it ended up being just perfect. Enjoy!

Salted Brown Butter Rice Krispies Treats
From Smitten Kitchen

Ingredients:
-1 stick (8 Tbsp) butter
-Heaping 1/4 teaspoon flaky sea salt (I used flaky kosher salt, and just a large-ish pinch)
-10 ounces of marshmallows
-6 cups Rice Krispies (or 5 cups if your family eats them up before you can make these.)

1. Prepare an 8x8 pan, either by using butter to coat the sides and bottom, or non-stick spray.
2. In a medium sauce pan over medium-low heat, brown the butter stirring constantly. Be very careful not to burn it. Once browned remove from heat. Stir in salt.
3. Add marshmallows and stir until melted. If necessary, use low heat to melt any stubborn marshmallows. Be careful not to over-cook the mallows.
4. Fold in the cereal. Using a heat-safe spatula to scrape the sides and bottom of the pan, evenly coat the Krispies.
5. Once mixed well, dump the mixture into the 8-inch square pan, making sure to scrape the sides and bottom of the pan well. Get your hands wet with cold water, shake off excess water. Now press the treats down. (This trick worked great! Didn't have a sticky-icky mess, and they pressed really easily.
6. Let the treats cool. Then cut into 2 inch square pieces.

Makes 16 treats.
4 PointsPlus per treat. (using either 5 or 6 cups of cereal)

Grape Leaf Rolls

This is a Syrian food favorite in our house. They are a little time consuming to make, but they make a lot and are easy to microwave! ~Kristina

Stuffed Grape Leaves (Greek Dolmades)


Ingredients:
1 (16-ounce) jar grape leaves
Rice Stuffing (see recipe below)
~1lb chicken thighs
Hot Water
Lemon Wedges
Rice Stuffing:
11/2 cup cooked long-grain white rice
1lb. ground beef
1lb. ground lamb
Salt and freshly-ground pepper to taste

Combine meat and rice in a large bowl and add a dash of salt and pepper.


Preparation:
Using a slotted spoon, remove the leaves from the water and lay them on paper towels to drain. With a sharp knife or scissors, cut out the protruding stems and any hard veins from the leaves. Set the grape leaves aside.

Preheat oven to 350 degrees F. Prepare Rice Stuffing.


To stuff the leaves, start with your largest leaves. Take a leaf and carefully spread it on a flat plate or pan with the veins facing upward to you (leaf shiny side down). If the leaf is torn or has a hole in it, take a reserved damaged leaf and use it as a patch, place the leaf over the hole.


Place approximately 1 to 2 tablespoons of the Rice Stuffing near the stem end of the leaf (the amount of stuffing will depend on the size of the leaves).
Press the stuffing into a small sausage-like shape.


Fold the stem end of the leaf over the filling, then fold both sides toward the middle, and then roll up into a cigar shape (it should be snug but not overly tight because the rice will swell once it is fully cooked and could burst). The rolls should be cylindrical (about 2 inches long and 1/2 inch thick)
Squeeze lightly in the palm of your hand to secure the rolls.
Repeat with the remaining grape leaves and filling.

Layer the bottom of a dutch oven or baking dish with the raw chicken thighs, this gives the rolls some good flavor and help prevent sticking. Arrange the stuffed grape rolls on top of the chicken thighs, seam-side down, packing them close together. Make a new layer as you fill the dutch oven. Two or three layers is fine (it is very difficult to cook evenly if you make more than four layers of rolls). NOTE: Don't cramp the rolls together as they won't cook well - also don't leave too much space between them as they will unravel.

When the bottom is completely covered, place any remaining grape leaves or chicken thighs over the top. Fill the dish/pot with 2-3 cups of water and lemon juice from the wedges. Sometimes I also just leave the squeezed lemons in. Weigh the stuffed grapes rolls down with an ovenproof plate turned upside down (one smaller than the circumference of the pan). Cover with a lid. Heat on the stovetop over medium heat, bring the liquid just to a boil; remove baking dish to the oven and cook approximately 45 to 60 minutes or until the grape rolls are tender and the water has been absorbed (there should be little or no trace of water, and only a bit of oil in the pot - some of the leaves may have tiny black specks, or maybe completely black - this is ok). Remove from oven.

Once the leaves are cooled down I sprinkle with some salt and eat plain. But I also know some people like a little cucumber sauce so added that here too. 

Yogurt-Cucumber Sauce:

1 cup plain yogurt
1/2 cup sour cream
1/3 cup diced cucumber
3/4 teaspoon dried dill weed


Source: http://whatscookingamerica.net/Vegetables/StuffedGrapeLeaves.htm

Grilled Salmon Tacos with Lime Slaw and Mango Salsa

I love fish tacos and found this recipe online.  It is delicious!!! I included a few pictures.  I have made it twice.  Once with flour tortillas and the other with corn tortillas.  Both are tasty.  The bigger flour tortillas aren't as messy, but the small corn tortillas make it fun.  Also, for my tastes, I omitted the onions and used a green pepper for the salsa.
-Jessie


Grilled Salmon Tacos with Lime Slaw and Mango Salsa


Salsa left, slaw right.  


Ingredients
    1 1/2 pound salmon filet with skin on
    1 teaspoon chile powder
    1/4 teaspoon salt
    1/4 teaspoon sugar
    1/4 teaspoon cumin
    8 corn tortillas
    4 green onions, thinly sliced
For the Slaw
    1 bag shredded cabbage, or 10 ounces
    handful chopped cilantro
    1/2 cup light mayonnaise
    2 tablespoons freshly squeezed lime juice, from 1-2 limes
    1 teaspoon sugar
    pinch salt and chile powder
For the Salsa
    1 mango, skinned and cut into small pieces
    1/4 cup diced red onion
    1/4 cup diced red bell pepper
    handful chopped cilantro
    1 teaspoon olive oil
    1 jalapeno pepper, seeded and minced
    1 juice lime
    pinch salt
Directions
1. Pat the salmon dry. Combine the chile powder, sugar, salt and cumin in a small bowl and sprinkle over the surface of the flesh-side of the salmon. Set aside.
2. Prepare the slaw. Whisk mayo with lime juice, sugar, salt and chile powder in a large bowl. Add the cabbage, cilantro and onions and toss well to coat with the lime dressing. Cover and refrigerate.
3. Prepare the salsa. Combine all ingredients in a medium bowl. Taste for seasoning, cover and refrigerate.
4. Spray the grill with cooking spray and light a medium-hot flame. To test heat on a charcoal or gas grill, hold your hand about 5 inches over the flame. You should only be able to keep it there for 3-4 seconds.
5. Place salmon skin side down on the grill, cover and cook for about 5 minutes, depending on the thickness of the fish (cook fish about 10 minutes per inch of thickness). Flip salmon over, peel off the skin and cook for 3 minutes more, or until the fish flakes easily with a fork. Remove from heat and place it pink flesh up on a plate. (The underside of the skin will be an unattractive gray color).
6. Place the corn tortillas on the grill for a few seconds a side to warm up. Flake fish and divide evenly between the tortillas. Top with lime cilantro slaw and mango salsa. Serve immediately with lime wedges.


Grilled salmon and the start of the taco using the flour tortilla. 


Saturday, November 10, 2012

Burritos

Super Easy Burritos
(I made this for 2 adults and a toddler, it probably serves 3-4 adults, double it for more servings) Note: I freeze leftover rice, that is what I used in this recipe. It always comes in handy. I always make extra rice so that I can keep some in my freezer. :)

Ingredients:
-8 ounces (1/2 pound) Lean ground beef, turkey or chicken
-1 cup brown (or white) rice, cooked
-1/2 of 15 ounce can of pinto beans, rinsed well
-10 ounce can of enchilada sauce
-dash of salt and pepper if desired
-8 ounces Shredded cheddar cheese (I used about half of a package total)
-5 or more tortillas

1. Brown ground beef in large skillet over medium heat. Drain fat, if any.
2. Add rice, beans and half of the enchilada sauce. Stir well. Add salt and pepper to taste if desired. Stir over medium heat for 5 minutes or so. Remove from heat.
3. Soften tortillas according to package directions, or use a tortilla warmer if you have one.  (Something like this.)
4. Add a small amount of cheese to the tortilla, followed by the filling. See picture below. The orange rectangle is where I put the cheese and filling. Then I folded the ends in, and rolled the tortilla away from me. 
5. Place the rolled tortillas in a casserole dish. I recommend greasing it beforehand, I didn't and had to scrape to get them out. Top with the remaining enchilada sauce and a sprinkling of cheese if desired. Cover pan with foil. 
6. Store in fridge until ready to bake. Keep foil on pan (make sure the cheese isn't touching the foil!) and bake for 20-25 minutes at 350. Remove foil and bake for an additional 5-10 minutes to crisp up the burritos. 

Serve with sour cream and salsa. Diced avocado is a plus! :)


Tuesday, May 1, 2012

Carrot Cake {Cupcakes}

Carrot Cake {Cupcakes}
Ingredients:
- 2 cups flour
- 2 cups sugar
- 2 tsp baking soda
- 2 tsp cinnamon
- 1 tsp salt
- 1 cup vegetable oil
- 4 eggs
- 3 cups grated carrots
- 1 cup chopped nuts (optional)


Directions: 
1. Sift together dry ingredients and then mix in oil, eggs and carrots. Stir in nuts if desired. 
2. Fill cupcake papers (or greased muffin tins) to about 2/3 full. 
3. Bake for 12-15 minutes (or until set in the middle) in a 350 degree oven. 
4. Cool and frost with cream cheese frosting. (see recipe below)

Cream Cheese {Frosting} (Courtesy of Martha Stewart Original recipe is here)
Ingredients:
- 8 oz cream cheese (softened)
- 1 stick butter, cut into pieces (softened)
- 1 cup powdered sugar
- 1 tsp pure vanilla extract

Directions:
1. Place cream cheese in a mixing bowl of a standing mixer. Beat until creamy. 
2. Gradually add butter and continue beating until smooth and well blended.
3. Sift in powdered sugar, and continue beating until smooth
4. Add vanilla and stir to combine.

Decorate cupcakes with a sprinkling of cinnamon and candy carrots, peas, and radishes. To make carrots, slightly soften some Starburst candies, and roll them into desired shapes. Top with some sort of green candy (Jess used jelly beans, but green twizzlers would work too.) For in depth instructions on making carrots, go here. Go here for more inspiration. 


Thursday, March 8, 2012

Baked Potato Soup

Baked Potato Soup
adapted slightly from here


Ingredients:
-1/2 lbs. Bacon, chopped
-1 medium yellow onion, minced
-2 celery stalks, minced
-2 carrots, shredded
-2 cloves garlic, minced
-4 large russet potatoes (3 lbs 5 oz in my batch)
-32 oz. Fat-free, reduced-sodium chicken broth
-1/4 c. Butter
-1/4 c. Flour
-2 1/2 c. Milk (1% is what I used)
-3/4 tsp. Salt
-Ground black pepper, to taste
-1/8-1/4 tsp ground nutmeg (optional)
-1/2 c. Sour cream (I used light)


Toppings: (not included in PointsPlus values)
-Extra bacon, if desired
-Extra sour cream, if desired
-shredded cheddar cheese, if desired
-chopped green onions, if desired


1. Begin by preparing your vegetables: I chopped my potatoes in large chunks, about 1 inch cubed (though they varied in size greatly.) I wanted to have a chunky potato soup, so I left them in large chunks. I left the skins on, but you don't have to. Mince the onion as fine as you are able without driving yourself crazy. To mince the celery, start by cutting the stalks down into smaller pieces, then split the pieces length wise and mince. At this point I was tired of mincing, so I got out my grater to shred the carrot instead of mince it. It was much faster. Rinse your cutting board, and cut your bacon into small pieces.


2. In a large stock pot, cook the bacon pieces over medium heat until cooked through and crispy (but not too crispy). Set aside bacon on paper towels to drain off fat. Put a couple paper towels in the stock pot to soak up the bacon grease. (Then put them in your yard waste or compost bin!) :)


3. In the same stock pot, put a small amount of the chicken broth. Add the onion, celery, carrot, and garlic. Cook until tender. (About 5 minutes)


4. Add the remaining broth and potatoes. (The potatoes weren't fully covered by the broth, don't worry if this is the case for you as well, they will cook down!) Cover and simmer over medium heat for 25-35 minutes, until potatoes are nearly soft when poked with a fork. Reduce heat to low. Cover.


5. In medium saucepan, over medium heat, melt butter. Once melted add flour, whisking constantly. Whisk for about a minute. Mixture should be bubbling and thick. Slowly, about a couple tablespoons at a time, add milk. Whisking constantly. Once all of milk is incorporated, add salt, pepper and optional nutmeg. Stir. Continue to stir for a minute or two for the mixture to thicken. Add thickened milk to potato soup base.


6. Continue to cook soup covered, over low heat for an additional 15-20 minutes. Stirring occasionally. Once potatoes have begun to break down, and thicken soup, add sour cream. Stir well, cook for a minute or two longer and serve. Top with toppings as desired.


Yields 16 cups
Serves 8 generously (2 cup servings)
=9 PointsPlus
(or Serves 10 (1 1/2 cup servings) for 7 PointsPlus per serving)


Enjoy! :)


Thick cut potatoes (I cubed them further, of course.)

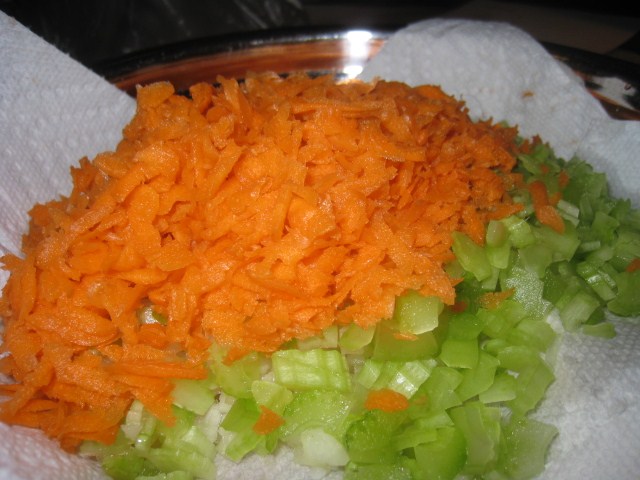
Shredded carrot, minced celery, and mince onion on the bottom. I used a napkin to separate them from the potatoes. 
Yum! It looks like there is cheese in this, but there isn't. That is simply some of the carrot shining through. It kind of tricked me into thinking there was some cheese in mine though. :)

Monday, March 5, 2012

Taco Soup

A week or two ago I was looking for a recipe for taco soup. A friend had made some a few months ago and it was so delicious I wanted to try myself. I could have asked her for the recipe, but it was the night I wanted to make it, so I decided to just google it. I have tweaked a recipes.com recipe... enjoy!


Taco Soup

Ingredients:
1 lb ground beef (or ground turkey)

1 onion, chopped (I never add the onion)

1 (1 ounce) package of Hidden Valley Ranch dressing mix (I was so surprised at this one, but it makes the soup)

1 package taco seasoning mix (1 ounce)

1 can of pinto beans

1 can kidney or chili beans

1 can corn (or frozen corn)

1- 2 cans diced tomatoes ( can use Mexican-style or regular)

1 can tomato sauce

1 can diced green chiles

Directions:
1. Cook ground beef and onions until browned. Then drain.

2. Add ranch dressing and taco seasoning to the beef.

3. Transfer to a large pot and then add all other ingredients. Add a small amount of water to stretch the soup.

4. Simmer for one hour.


It is a pretty simple recipe. You can add or substitute ingredients as desired. A must is to have sour cream and grated cheese (and/or olives) to put on when serving it. Tortilla chips or fritos can also be added. It makes about 8-10 adult servings. Freeze half and then you've got a meal to pull out later. Tonight I have taken out our leftovers to enjoy!

Pictures to come later.

Ham and Spinach Frittata

Ham and Spinach Frittata


6 eggs
1/3 cup milk
1/3 cup spinach - chopped
1/3 cup ham
1/2 cup onion
1 tsp pepper
pinch of salt (the ham

Heat oven to 375

Sautee onion with butter in pan. Wisk eggs, milk, salt and pepper together. Add Spinach, Ham, and cooked onion.

Pour into greased glass pie plate. Cook for about 20 minutes. (Check to see if egg is runny in the middle)

Serve with sour cream or toast.

Easy Peasy,
Enjoy!


Thursday, February 23, 2012

Turkey Chili

Hey Gang! So two things I wanted to share. One, three weeks ago I signed up for a meal-planning tool called Emeals. So far, it's been pretty good. I like that it challenges me to try new things, but without having to come up with all the ideas and the shopping lists! Downside: we don't 'love' ALL the meals. Some are just so-so. Let me know if you have more questions about it. For me, it's always been a HUGE challenge planning our meals, so this was a good bet. Already I have tried a few new dishes and they are ones I would make again, even for company! (Or sick people. The old-fashioned Chicken Noodle Soup was a hit with us)


My second thing is actually to share a recipe that I made separate from Emeals. I actually got the idea from All Recipe. I am going to just copy and paste the main recipe, but then I will tell you how I altered it because I did and it turned out really good. So good, in fact, that I actually got 3rd place in our Chili Cook-Off at church! Not bad, considering it was THE FIRST time I've every made chili! Ha; go figure.


Anyway, the turkey meat was a big hit, but also using the taco seasoning. If you like taco seasoning, it's perfect, if you don't want that overwhelming taste I would recommend using about half the package instead of all of it.

Ingredients

  • 3 tablespoons vegetable oil, divided
  • 1 1/2 pounds ground turkey
  • 1 (1 ounce) package taco seasoning mix
  • 1 teaspoon ground coriander
  • 1 teaspoon dried oregano
  • 1 teaspoon chili pepper flakes
  • 2 tablespoons tomato paste
  • 1 (14.5 ounce) can beef broth
  • 1 (7 ounce) can salsa
  • 1 (14.5 ounce) can crushed tomatoes, or coarsely chopped tomatoes packed in puree
  • 1 (7 ounce) can chopped green chile peppers
  • 1 medium onion, finely chopped
  • 1 green bell pepper, diced
  • 3 medium zucchini, halved lengthwise and sliced
  • 1 bunch green onions, chopped
  • 1 cup sour cream
  • 1 cup shredded Cheddar cheese

Directions

  1. Heat 1 tablespoon of oil in a large stock pot over medium-high heat. Crumble turkey into the pot, stirring with a wooden spoon to break apart as much as possible. Season with taco seasoning mix, coriander, oregano, chili flakes, and tomato paste, and mix until meat is evenly coated with seasonings. Continue cooking, reducing heat if necessary, until turkey is well browned.
  2. Pour in beef broth, and simmer to reduce liquid slightly, about 5 minutes. Add salsa, tomatoes, and green chilies, and continue cooking at a moderate simmer for ten minutes. Adjust the thickness at any time you feel necessary by adding water.
  3. While chili is still cooking, heat one tablespoon of oil in a large skillet over medium-high heat. Cook onion and green bell pepper, stirring occasionally for 5 minutes, or until onion is translucent and bell pepper is lightly browned. Add onion and bell pepper to the chili, and continue cooking at a very low simmer.
  4. In the same skillet, heat the remaining tablespoon of oil over medium-high heat. Add the zucchini, and cook stirring occasionally, for 5 minutes, or until lightly browned. Add the zucchini to the chili, reduce heat, and continue cooking 15 minutes more. Again, adjust the consistency with water as needed.
  5. Ladle chili into serving bowls. Top with sour cream, green onion, and cheddar cheese, and serve.

Ok, so here are my modifications:

-since I am not a huge cooked tomato fan (well, I like them, just not a ton of it) I only used half the can of crushed tomatoes. 

-I left out the tomato paste entirely (even though it's only a little bit) I did not want my chili to be dominated by tomato taste. 

-added a bigger more salsa, and I always use the refrigerated salsa in a tub from the store. It's much fresher and better. (I know I just said I didn't like too much tomato - but something about the flavor of the salsa was different and yummier than just straight tomatoes)

-Don't skimp on the toppings: sour cream, green onions, and cheddar cheese really make it great!


Well, don't be mad, but I am going to have to break my own rule and not post a picture of my meal. In my defense, I made this two Sunday's ago and didn't think to post it on here until now! :) You still love me, right??